文章同步更新于我的个人博客:松果猿的博客,欢迎访问获取更多技术分享。
同时,您也可以关注我的微信公众号:松果猿的代码工坊,获取最新文章推送和编程技巧。
之前一篇文章openlayers学习(一)还是今年四月份写的,搁置了许久,这个文章就当作那个系列的后文吧
项目初始化
这个项目严格意义上来说是一个课程作业,不过老师还让我们用html+juery来写,诶呀,实在在原始了好吧,不是说这种方式不好(跟着老师的方法写了一遍,可能是我react vue写多了,怎么感觉写着这么别扭呢?),而是这已经不是主流了,下面我就直接用vite+vue3+springboot+postgresql重构一下这个项目吧
我之前那一篇文章已经配置了初始化项目:(Vite初始化Vue3+Typescrpt项目)[https://blog.csdn.net/2301_78796401/article/details/143724344],可以遵循我的方法配置一下项目。
配置好项目后,我们就可以开始敲了
首先初步想一下大致UI框架:
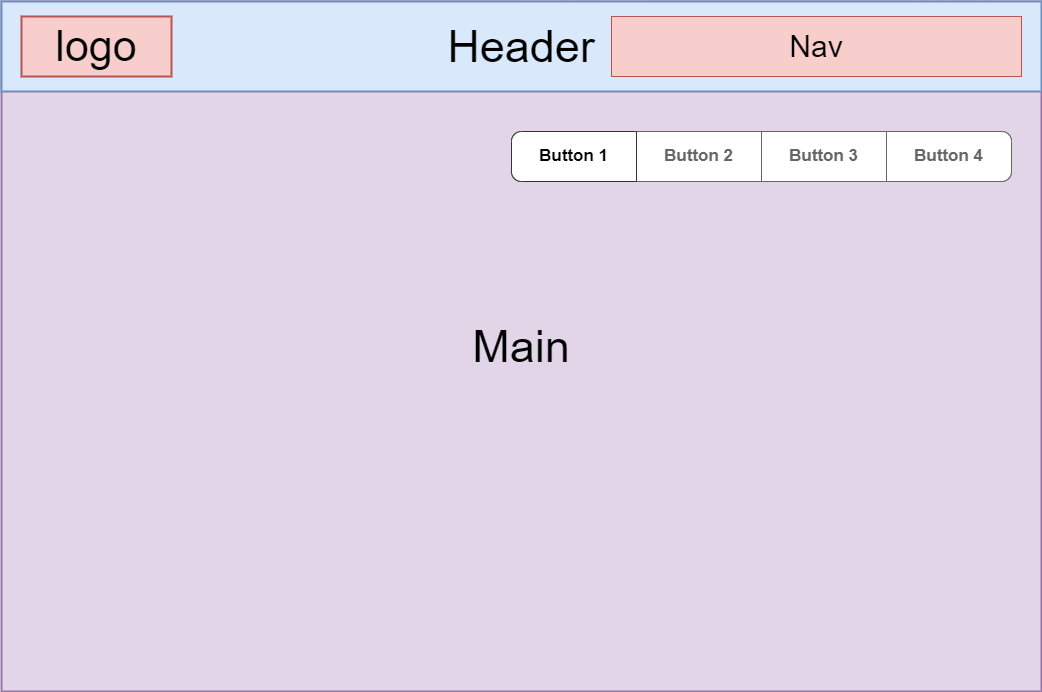
项目框架
首先新建Header组件
@/components/Header.vue
1
2
3
4
5
6
7
8
9
10
11
12
13
14
15
16
17
18
19
20
21
22
23
24
25
26
27
28
29
30
31
32
33
34
35
36
37
38
39
40
41
42
43
44
45
46
47
48
49
50
51
52
53
54
55
56
57
58
59
60
61
62
63
64
65
66
67
68
69
70
71
72
73
74
75
76
77
78
| <template>
<div class="header">
<div class="logo">
<img src="../assets/img/logo.png" alt="logo" />
</div>
<div class="navigation">
<ul>
<li v-for="item in nav_list">{{ item.name }}</li>
</ul>
</div>
</div>
</template>
<script setup>
import {} from "vue";
const nav_list = [
{ name: "查询投放区域" },
{ name: "增设投放区域" },
{ name: "单车定位查询" },
{ name: "单车热点分析" },
];
</script>
<style lang="scss" scoped>
.header {
display: flex;
align-items: center;
justify-content: space-between;
padding: 0 20px;
height: 64px;
background: rgba(8, 10, 18, 0.72);
backdrop-filter: blur(12px);
-webkit-backdrop-filter: blur(12px);
border-bottom: 1px solid rgba(0, 0, 0, 0.1);
.logo {
img {
height:55px;
transition: all 0.3s ease;
&:hover {
transform: scale(1.05);
}
}
}
.navigation {
margin-left: 40px;
ul {
display: flex;
list-style: none;
margin: 0;
padding: 0;
gap: 8px;
li {
padding: 8px 16px;
font-size: 18px;
color: #ffffff;
font-weight: 500;
cursor: pointer;
border-radius: 8px;
transition: all 0.3s ease;
&:hover {
background: rgb(255, 255, 255);
color: #007AFF;
}
&:active {
background: rgba(75, 75, 75, 0.1);
transform: scale(0.98);
}
}
}
}
}
</style>
|
在根组件App.vue引入
1
2
3
4
5
6
7
8
9
10
11
12
13
| <template>
<div class="app">
<Header></Header>
</div>
</template>
<script setup lang="ts">
import Header from "@/components/Header.vue";
</script>
<style scoped>
</style>
|
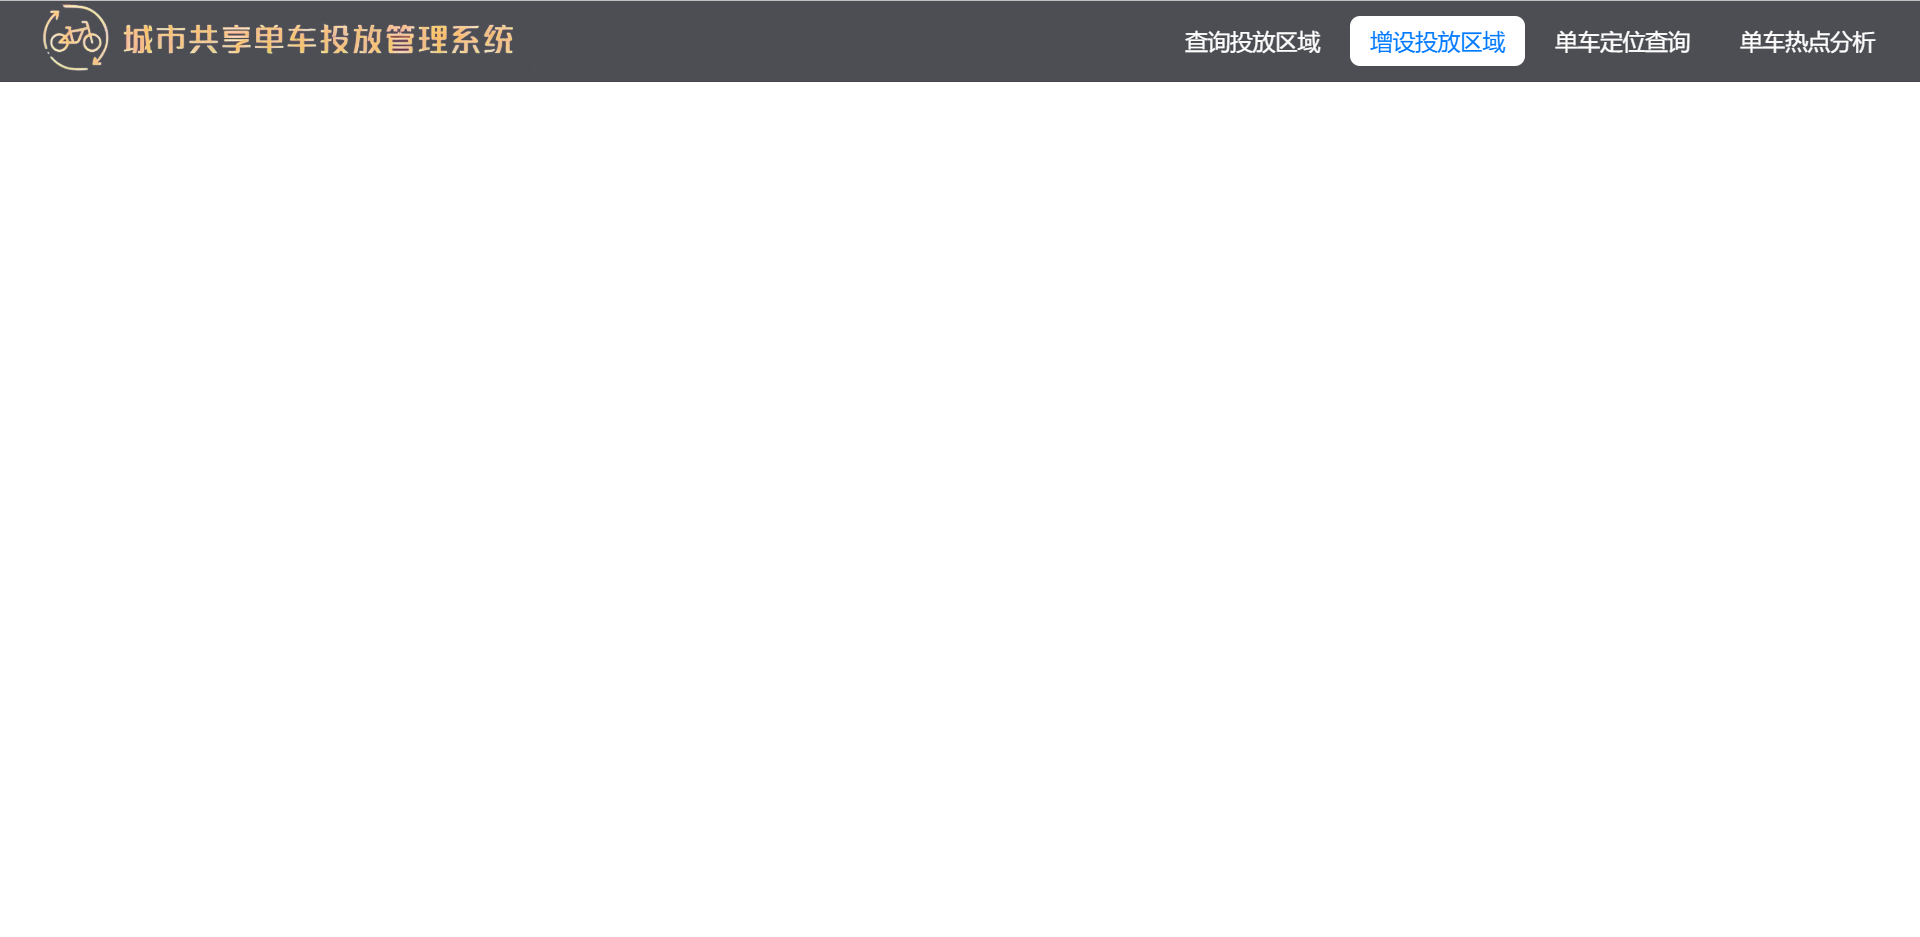
大致结构已经出现了
Openlayers使用天地图
开始将openlayers引入吧,不过在此之前我们需要理解一下Openlayers相关基础:

Openlayers将整个地图看作是一个容器对象(Map),其核心组件包括地图图层对象(Layer),对应图层的数据源对象(Source)与矢量图层样式对象(Style),地图展示相关的地图试图对象(View),还有与地图投影相关的Projection对象,除此之外容器中还有一些特别的层,如Overlayers表示叠加在地图之上的业务图层,内置的地图控件对象Controls。
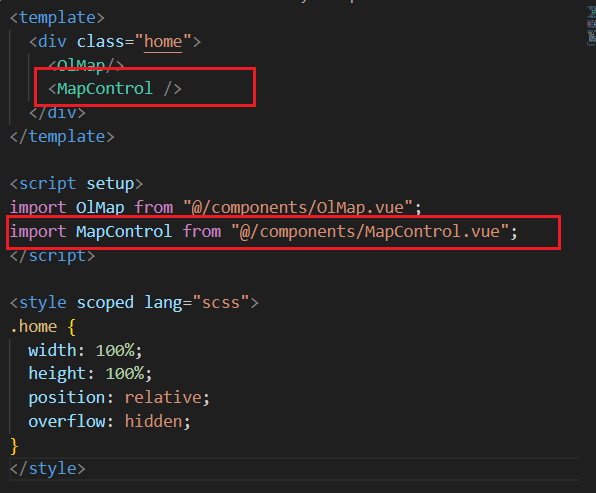
在view文件夹下新建Home.vue,在component文件夹下新建OlMap.vue
@/views/Home.vue
1
2
3
4
5
6
7
8
9
10
11
12
13
14
15
16
17
18
| <template>
<div class="home">
<OlMap></OlMap>
</div>
</template>
<script setup>
import OlMap from "@/components/OlMap.vue";
</script>
<style scoped>
.home {
width: 100%;
height: 100vh;
position: relative;
overflow: hidden;
}
</style>
|
@/components/OlMap.vue
1
2
3
4
5
6
7
8
9
10
11
12
13
14
15
16
17
18
19
20
21
22
23
24
25
26
27
28
29
30
31
32
33
34
35
36
37
38
39
40
41
42
43
44
45
46
47
48
49
50
51
52
53
54
55
56
57
58
59
60
61
62
63
64
65
66
67
68
69
70
71
72
73
74
75
76
77
78
79
80
81
82
83
84
85
| <template>
<div id="map"></div>
</template>
<script setup>
import { onMounted, ref } from "vue";
import { Map, View } from "ol";
import { transform } from "ol/proj";
import { Tile } from "ol/layer";
import XYZ from "ol/source/XYZ";
const map = ref(null);
const token = "换成申请的天地图key";
// 初始化地图
const initMap = () => {
const view = new View({
center: transform([118.65, 32.09], "EPSG:4326", "EPSG:3857"),
zoom: 10,
});
// 创建天地图矢量底图和标签图层
var layerTianDi = new Tile({
source: new XYZ({
url: getLayerUrlByData("street", 4326, token),
projection: "EPSG:4326",
wrapX: true,
crossOrigin: "anonymous",
}),
});
var layerTianDiLabel = new Tile({
source: new XYZ({
url: getLayerUrlByData("street_label", 4326, token),
projection: "EPSG:4326",
wrapX: true,
crossOrigin: "anonymous",
}),
});
// 创建地图实例
map.value = new Map({
target: "map",
layers: [layerTianDi, layerTianDiLabel],
view,
});
};
// 根据图层类型生成相应的URL
function getLayerUrlByData(type, wkid, token) {
let url = "http://t{1-7}.tianditu.com/DataServer?";
let layerId;
switch (type) {
case "image":
layerId = "img_";
break;
case "label":
layerId = "cia_";
break;
case "street":
layerId = "vec_";
break;
case "street_label":
layerId = "cva_";
break;
default:
throw new Error("Unsupported layer type");
}
const tileMatrixSetId = wkid === 4326 ? "c" : "w";
return `${url}T=${layerId}${tileMatrixSetId}&x={x}&y={y}&l={z}&tk=${token}`;
}
onMounted(() => {
initMap();
});
</script>
<style lang="scss" scoped>
#map {
width: 100%;
height: 100%;
}
</style>
|
地图已经成功显示出来了(我用的是天地图的数据源,需要去国家地理信息公共服务平台申请key,天地图同时提供 WMTS 和 XYZ(或其他格式)的服务,我这里使用XYZ)

添加菜单栏
下面我们给地图右上角添加一个菜单栏,咱们使用Element-Plus现成的组件,构建更快
新建@/components/MapControl.vue
1
2
3
4
5
6
7
8
9
10
11
12
13
14
15
16
17
18
19
20
21
22
23
24
25
26
27
28
29
30
31
32
33
34
35
36
37
38
39
40
41
42
43
44
45
46
47
48
49
50
51
52
53
54
55
56
57
58
59
60
61
62
63
64
65
66
67
68
69
70
71
72
73
74
75
76
77
78
79
80
81
82
83
84
85
86
87
88
89
90
91
92
| <template>
<el-menu
class="map-control-menu"
mode="horizontal"
:ellipsis="false"
:popper-offset="12"
@select="handleSelect"
>
<!-- 定位菜单 -->
<el-sub-menu index="Draw">
<template #title>
<el-icon><EditPen /></el-icon>
<span>绘制</span>
</template>
<el-menu-item
v-for="item in menuItems.Draw"
:key="item.id"
:index="`Draw-${item.id}`"
>
{{ item.name }}
</el-menu-item>
</el-sub-menu>
<!-- 图层菜单 -->
<el-sub-menu index="layers">
<template #title>
<el-icon><MapLocation /></el-icon>
<span>图层</span>
</template>
<el-menu-item
v-for="item in menuItems.layers"
:key="item.id"
:index="`layers-${item.id}`"
>
{{ item.name }}
</el-menu-item>
</el-sub-menu>
<!-- 工具菜单 -->
<el-sub-menu index="tools">
<template #title>
<el-icon><Tools /></el-icon>
<span>工具</span>
</template>
<el-menu-item
v-for="item in menuItems.tools"
:key="item.id"
:index="`tools-${item.id}`"
>
{{ item.name }}
</el-menu-item>
</el-sub-menu>
</el-menu>
</template>
<script setup>
import {EditPen, MapLocation, Tools } from "@element-plus/icons-vue";
const menuItems = {
Draw: [
{ id: "drawPoint", name: "绘制点" },
{ id: "drawLine", name: "绘制线" },
{ id: "drawPolygon", name: "绘制面" },
],
layers: [
{ id: "satellite", name: "影像图" },
{ id: "street", name: "街道图" },
{ id: "terrain", name: "地形图" },
],
tools: [
{ id: "measure", name: "测量" },
{ id: "draw", name: "绘制" },
{ id: "analysis", name: "分析" },
],
};
</script>
<style lang="scss" scoped>
.map-control-menu {
position: absolute;
top: 20px;
right: 20px;
background: rgba(255, 255, 255, 0.85);
border-radius: 10px;
padding: 4px;
overflow: visible;
border: 1px solid rgba(0, 0, 0, 0.1);
box-shadow: 0 2px 4px rgba(0, 0, 0, 0.05);
}
</style>
|
在Home.vue引入菜单栏组件
菜单栏成功显示在地图上
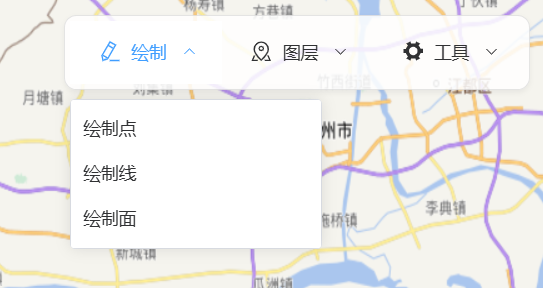
这样我们就把主要的UI框架实现了。
项目地址:https://github.com/songguo1/Share_bike